How to record guitar with CrossWire
Recording well at home comes down to three habits: a clean input, honest monitoring, and a tone you can recall exactly. None of them need a treated room, and all three live in the meters.
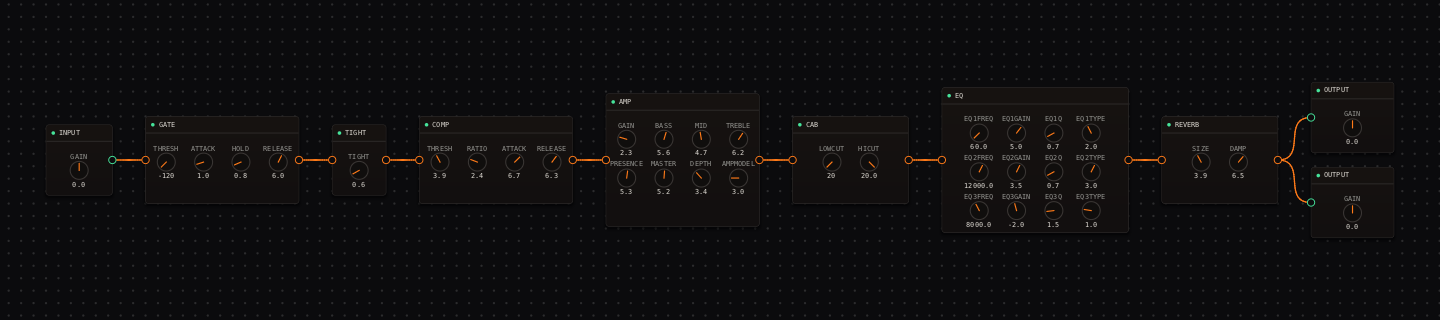
CrossWire field notes. The rig below is real and recallable, the kind of focused clean tone that tracks well and leaves your options open.
Recording starts in Audio Setup: pick the driver (WASAPI, DirectSound or ASIO on Windows), the input and output device, and the buffer size. Smaller buffers mean lower monitoring latency and more CPU pressure, and the top bar shows a CPU percentage beside a latency readout in milliseconds. Hovering that readout gives the xrun count, and any xrun you hear on a take is a buffer that was too optimistic, so the meters choose your setting.
Gain staging is two knobs and two meters
The INPUT node's GAIN knob (-24 to +24 dB) is the trim. Play your hardest part and keep the IN meter's peak-hold marker out of the red, because clipping before the gate and drive stages cannot be fixed later. The OUTPUT node's GAIN sets what your interface or DAW receives; watch the OUT meter's dB readout while you match the bypassed level, using the global bypass button as the honest A/B.
Track the core, keep options open
A focused amp-and-cab sound with modest ambience records well, and the same graph loads in the CLAP plugin inside your DAW, so the exact rig (wiring, models, knob values) recalls with the session. If you want re-amping options, also record a dry DI track and run the CLAP plugin on it afterwards. Same engine, same rig, decided later.
Name presets by job
File then Save with names like "rhythm tight room" or "lead long tail" beats "Preset 7" at 2 a.m. The top-bar preset name flips to "(edited)" the moment any knob moves, so you always know whether the saved version is what you are hearing.
Recording guitar: quick answers
- What buffer size should I record guitar at?
- The smallest one that gives you zero xruns for a full take. Start small, play the busiest part of the song, and hover the latency readout in the top bar to see the xrun count. Buffer size changes latency and CPU load, never the tone, so pick it with the meters rather than folklore.
- How do I set input gain when recording guitar?
- The INPUT node's GAIN knob (-24 to +24 dB) is your trim. Play your hardest part and keep the IN meter's peak-hold marker out of the red. Clipping before the gate and drive stages is unfixable later.
- Can I re-amp or change the tone after recording?
- Yes. Record a dry DI track in your DAW alongside the take, then run the CLAP plugin on it afterwards. Same engine, same rig, decided later. The exact rig recalls with the project, so a note like "Rig Seed 2986, DELAY MIX at 4" is a complete tone recall.
Track with a real rig
Open the Randomizer, paste a seed, click Recall, and start with a documented tone.
- Tutorials: 14 recallable rigs, each documented to the knob.
- Get the demo: standalone app plus the CLAP plugin, full fidelity.
Get the CrossWire demo → The demo and licensed builds both run full audio fidelity, so what you monitor is the sound you print.